Sunday, January 31, 2021

A Honeymoon at Troldhagen

In the previous century (1999), Doug and I were married and flew off to Norway for our honeymoon. Since we were all consumed with wedding preparations, I just booked a 10 day tour and let them decide which cities and sights to see. Edvard Grieg is a national treasure in Norway and thankfully, the tour included a visit to his former home, Troldhaugen. This statue of Grieg looks like a miniature, but I looked up his height and he was only 5 feet tall, so it's probably life-size, a tiny man!

Troldhaugen is a modest house, but you can feel the presence of the musical genius. A concert hall was built on the site, complete with a grass roof, one of my favorite things about Norway.

No chance of me trying the piano in the concert hall, but at least I got a photo.

I hunted down these photos in our photo album, but then I remembered that I had ScanCafe scan all my negatives a few years ago. Sure enough, I found these high quality images on my hard drive that I had forgotten about.

Twenty-six years and a pandemic later, I finally learned my favorite Grieg Lyric Piece, Wedding Day at Troldhaugen (as opposed to this post, A Honeymoon at Troldhaugen). 


For an authentic recording of all the Lyric Pieces, check out Leif Ove Andsnes playing them on Grieg's 1892 Steinway at Troldhaugen.


Looking forward to traveling again after the pandemic!

Sunday, January 03, 2021

Enabling SSL on Blogger with You Are Not Authorized Error

Everyone knows that SSL encryption has been required of all browsers since 2017. If you don't have it nowadays, you get the dreaded Not Secure warning next to the URL. 

But what if you have a blog hosted on Blogger with a custom domain name? Back then, it was costly to purchase SSL and even trickier to implement (which I've done for my work company). In 2019, Google started to provide free SSL for Blogger blogs. When I got around to implementing it, I got the dreaded "You are not authorized to use this domain" error. Clearly the custom domain name works and I own it, why the error?

After much searching, I found that I set up this blog custom domain many eons ago (10+ years) and Google as since changed the DNS configuration for Blogger custom domains. The only way I got this to work was to first remove the custom domain from Blogger and then reimplement it with the new CNAME. So from the beginning...

  1. Log into your domain provider. I use GoDaddy, so screen shots will be shown from there.
  2. Go to your Blogger menu and click Settings on the left.
  3. Scroll down to Publishing and click on Custom Domain.
  4. Click Delete (I know this is scary, it's just temporary...)

  5. Now add the domain name back to the custom domain. This time, you will see an error with some small print saying how to set up the DNS configuration with your domain provider. Copy the CNAME information down in Notepad. This info is unique to your blog.
  6. Go back to your domain provider and navigate to the DNS settings for your website. In GoDaddy, it's Manage DNS under the 3 dots.

  7. If you already have the custom domain, you should already have the CNAME entry for www to ghs.google.com. Click Add at the bottom and add the CNAME with all the cryptic characters. It should look something like this when you're done.

  8. Go back to Blogger and add the Custom Domain name again. It should work this time.
  9. Now scroll down to HTTP section and enable HTTPS availability.

  10. The status will change to Available shortly. Try to access your site with the https:// prefix. It will take 15 minutes to an hour to become effective. Be patient!
  11. After you can access your site over https://, then you can enable the HTTP redirect.
  12. Enjoy your free SSL!

Saturday, November 28, 2020

Zipline Platform from Solidworks to Reality

 
Years ago, I installed a zipline between trees for the kids to play on. Since we didn't want to install a pool or get a trampoline, I decided on a swing between trees and zipline so we'd have outdoor playthings that were completely different from everyone else.

For years we just climbed a step ladder to get onto the zipline, which was ok, but not exactly safe or convenient. 

This year, as part of our home improvement quarantine activities, I finally designed a zipline platform. Having just learned Solidworks in the past year, I whipped up this design in a matter of hours! Here's the model, next to the modeled tree. The bar in the back is a handrail to steady yourself when standing on the platform.


And the assembly drawing:

There's a bill of materials for assembly. The different lengths of lumber of simply different configurations of the 2x4 or 2x3 base part.

We were lucky to have leftover decking and some lumber, but needed to purchase more 2x4s. Here's the cut list for determining how much lumber to buy.


This shopping trip started a Snapchat Home Depot meme for Dova. Apparently none of her girlfriends' moms take them Home Depot. Geez, who's gonna raise the next generation of Rosie the Riveter?! Also, straight 2x4s are are to find!


We call it our big life guard chair. We ended up cutting off 6" off the bottom of the legs because the platform was too high. Then later we decided to raise the starting point of the zipline anyway, so that wasn't necessary. It's secured by to the tree by lag bolts using the extra 36" 2x4s (6th row above) attached to a 2x4 the same width of the tree attached to the stand. 


If we were to do it again, I'd make the steps up to the top at an angle so that it's not as tippy. Usually we have someone stand of the backside to keep it steady, although it does stay put without it.

Here's master builder Doug testing out the platform:

And now that Dova is a teen, it's a big hit with S'mores night in the dark!

Thursday, October 01, 2020

Hancock Shaker Village Cross Stitch


It only takes a pandemic for me to finish a cross-stitch!

A decade ago in 2010, we first saw this painting of The Tree of Life, "Seen and painted by Hannah Cohoon. City of Peace Monday July 3rd 1854", from The Andrews Collection at Hancock Shaker Village. I was fascinated by the design which felt so balanced and abundant.

Tree of Life - Shaker - painted by Hannah Cohoon 

The following year, I posted about the cross-stitch version of this painting in their store, but none were in stock. I believe it was around $30 so I wasn't about to buy it anyway. I took this quick photo and then painstakingly mapped my own pattern in Excel, adding a title and contrasting border.


Hancock Cross Stitch

For years, the embroidery hoop only allowed the letters “cock shaker villa” to be shown from the words "Hancock Shaker Village”. It was our nickname for the piece.


Now it is finally complete! I've shared the pattern here. The printable pattern has the standard 10 stitch grid (best viewed at 50% zoom). The only embroidery floss colors I purchased were the greens, brown and blue, listed on the last tab. The light coral and red were taken from left over floss. The cross-stitch fits in a 8.5"x11" frame nicely.

It's nice to finally get these crafting projects done!

Sunday, September 20, 2020

Crochet Piano Keyboard


I've finally made good use of my craft time and completed this 88-key crochet piano scarf. It's based on this patter from Crochet Spot. It's not exactly the size of a real keyboard, as the keys are a little too wide and too short.


But it does make for a nice conversation piece if you keep the right side out at all times (the back side just has extra black and white crochet stripes).

And you can get this fantastic empow(her) shirt at at our local Indigo Store. RIP RBG.

Monday, March 30, 2020

Unmastering the Cable Knit Hat

A couple years ago, I tried to make this free cable knit hat pattern from Michael's using I Love This Chunky Yarn from the craft store that I don't shop from anymore (don't even want to link to them!).

They look decent enough right? Except it was just too tight. I tried wearing it once to a ski resort (while not skiing of course, always use a helmet while skiing!) to convince myself that it was okay and would loosen up, but it kept popping off my head because it was too tight. We ended up donating them, because it would probably fit kids with smaller heads fine.

For the next version made with Lion Brand Hometown Yarn in Lake Tahoe Blue, I tried to make a loose slouchy cable hat, so I added an extra cable which is 8 stitches. And I made it extra tall.

This took nearly two skeins and ended up being really heavy. Sure you can put it on your head for the cool slouchy look, but it just falls off immediately after the photo shoot.


If you put in on top of your head so it doesn't fall off the back, it fits too loosely and just falls over your face.


Clearly, this cable hat doesn't work either. I completely frogged the hat (didn't want to donate this disaster), and started again. This time I used the Aspen Hat crochet pattern from 5 Little Monsters. It worked perfectly.


I was even able to reuse the pom pom.


So the key to making a chunky cable knit hat is not to make a chunky cable knit hat, you will never get the right number of cable stitches to work!

Friday, February 07, 2020

Crochet Heart Wreath

It's that time of the year for heart-shaped decorations! Here's a heart-shaped wreath covered in crochet flowers made from any scrap yarn with red, pink or purple hues.

Really, I only used scrap yarn for this project! Way too much pink and red yarn in this house... The only thing I purchased was some floral wire that I shaped into a heart by twisting it together, overlapping it 3 times.


Darice Floral Paper Wrap Wire Brown 8 Yards

For the flowers, I used a variety of free patterns from my fellow crochet artists. The largest flower in the center is Lisa's Rose Crochet Flower Pattern.

Another interesting pattern is Mikey's Crochet Bee Happy Flowers. This is reminiscent of the Crazy Exponential Necklace as it simply triples from row to row. I couldn't make it to the fourth row, but three is plenty. Up close, this flower looks like brain folds!


The majority of the flower uses Jenn's Small Rosette Pattern. It's quick and easy to make.

Attaching the flowers to the wireframe is a little tricky. The first time I tried to assemble them, the flowers would flop to the side and wouldn't stay in the front. I found a technique that worked to keep the flowers steady.

Using a yarn needle, thread one end between the wires so that the flower faces forward. This may be one or two wires depending on where the flower falls on the wire twist. The flower below is threaded under one wire.

Thread one end in between wires on the front side


Tie the flower on the backside of the wireframe. The flower below, shown from the backside, is threaded under two wires. Arrange all the flowers with ties until you are happy with the spacing.


Once all the flowers are positioned, untie each flower and knot it in place. Then wrap one end around all three wires and knot it again. Trim the excess ends. This is how it will look from the backside.


Hang and enjoy! Happy Valentine's Day!

Friday, November 15, 2019

Half Page Turns for Digital Sheet Music

Performing with one of my favorite page turners, Adam.


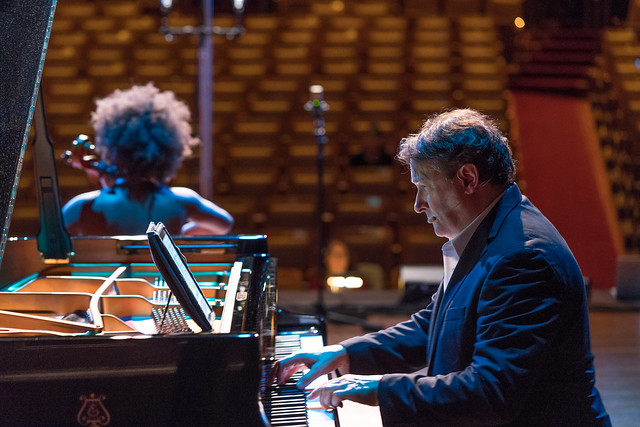
In 2012, we watched Christopher O'Riley perform on From the Top with a laptop folded back on the piano. This was before tablets were widely used, and certainly before the full-size iPad Pro came out.

Christopher O'Riley with Gordon Neidinger, mandolin, From the Top 2012


Host Christopher O'Riley with Ifetayo Ali-Landing
From the Top Photo by Neale Eckstein, 2017
Shortly afterward, Mr. O'Reilly switched to an iPad as seen here with Ifetayo Ali-Landing in 2017. Being a software geek through and through, I had to jump on the bandwagon. I didn't want to invest in an iPad Pro in case my efforts fell flat. I opted for a used (unfortunately discontinued) Samsung Galaxy Pro Tablet 12.2" and a Donner Bluetooth Pedal. At around $350 total, this is a much smaller investment than an iPad Pro 13" at $1000 and top off the line Page Flip Firefly Bluetooth Page Turner Pedal at $110.


Cheapness does come with a price. I lost 0.8" on the diagonal screen dimension (12.2" vs 13"), but because of the aspect ratio, this becomes even more in the horizontal direction in portrait mode. The width of the page determines how large the sheet music appears on the screen. Full-size sheet music is 9"x12" which is the same 4:3 aspect ratio as the iPad, or 1.333. Even 8.5"x11" pages have a similar 1.29 ratio. By comparison, a 16:9 ratio is 1.778. Here's a little math to determine the difference in the width of the two screens.


So the width of my 16:9 12.2" tablet screen is 6" versus the iPad at 7.8". That's a huge difference in width! So how does 6" look against the same music on a 9x12" page?


Actually, not that bad since music apps crop the white space of the page. At first, I was bothered by the bluish hue of the white background but I finally found the sepia tone to be more like sheet music paper.

The first thing I realized about using digital sheet music is that you have to turn the pages twice as often as paper sheet music. Paper sheet music in books or binders always show two pages at a time. This is fine when the music is not very complex, but when you in a complicated passage near the page turn this can be quite stressful. If you stomp the pedal too many times or press both pedals at once, the on-screen keyboard may pop up by accident or worse the program crashes. This would be disastrous in a performance!


My initial app for sheet music was Orpheus, but then I moved to MobileSheets for this feature: half page turns! I watched a fellow chamber music pianists effortless play a piano trio with his iPad Pro and asked him how he became comfortable turning pages with the pedal. He showed me his nifty forScore app (iOS only at a pricey $14.99!!) and how he uses half-page turns. Wait - doesn't that mean you have to turn pages twice as often, or 4 times the number paper sheet music turns?

With half-page turns, you press the pedal somewhere in the bottom half of the page and half of the next page pops on top of the screen. Then you seamlessly play from the bottom of the screen to the top of the screen without having to worry about pressing the pedal at exactly the right time. After you get to the next page at the top of the screen, you press the pedal again when it's convenient to fill down the rest of the page. So page turns are essentially decoupled from the actual playing and don't have to be timed perfectly right. Even though it's more presses, it's far less stressful.

But I didn't have an iPad Pro with the forScore app! With some searching, I found that the free version of MobileSheets also had half-page turns. It's a little tricky to enable, so here are the instructions (note the sepia tone which is easier on the eyes):

Tap and hold the screen to get the bottom toolbar.


Tap the page button (4th icon circled in green).


Under Display mode, select "Half Page". Also, you can set the Sepia tone lower on this settings page. Another setting I found invaluable was the page scaling mode (next button on the bottom toolbar). When you set to full screen, it stretches the page so that you don't get the letterbox wasted space you can see with the Orpheus screenshots at the beginning of this post.


Here is a half-page turn for a tricky passage in Beethoven's Archduke trio. You simply play from the bottom to the top of the page. In fact, this is a better way to learn the music through a paper page turn because you can see it all at once.


My first performance with digital sheet music was with Claude Bolling's Suite for Flute and Jazz Piano. My sheet music copy was purchased back in 1980 and is completely falling apart. Every time I practiced, more pages would opt to leave the binding and the scotch tape everywhere was getting ridiculous. The performance was definitely a bit more stressful with the digital page-turning, but it wasn't disastrous.

Still, I feel more comfortable with paper sheet music for performances. I mostly use digital sheet music to try out pieces before I decide to print them. Maybe someday I'll become more comfortable with it, but in the end, I'm still an old-fashioned paper sheet music gal. Thank goodness I didn't plunk down the money for the iPad Pro (although I'm sure I could find other uses for one)!